Monday, December 29, 2008

Driver side floor pans

As soon as the torque boxes were welded I started fitting the floor pans. They are not difficult to be installed but need quite a many test fittings, then cutting and drilling the holes for spot welding. The new floor pans are longer than the original ones in the front end of the pans. This showed up to be excellent for me as I had not ordered new toe boards. The extension can be seen below.


Before the final assembly the edges of the floorpan were painted as it might be difficult to do later. First I welded spots to the area below inner rocker. Then I applied squeezers and pliers to pull the pan against frame rail extension and to the correct line in the propeller shaft tunnel where old and new metal overlap about one inch. It may appear later that rust feels that area nice and cozy but butt-welding would have been too difficult, at least for me.


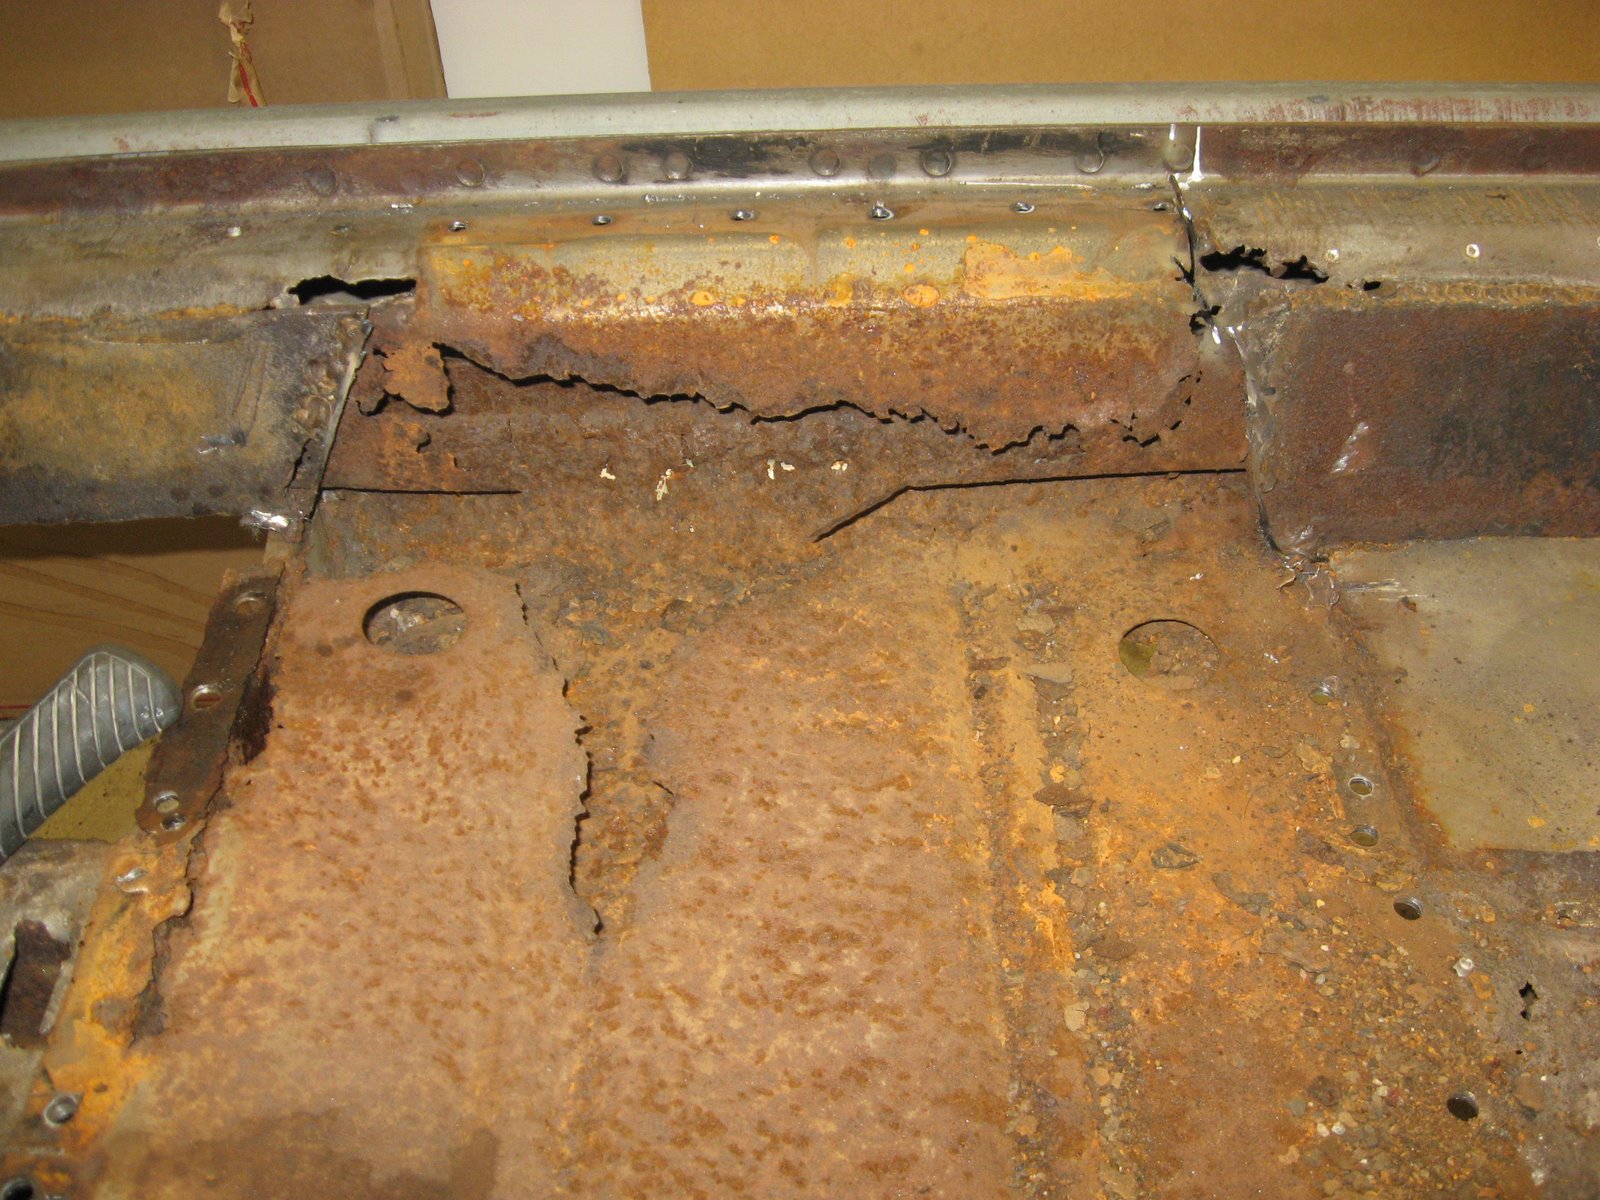
I had to weld a couple of spots working under the body because I had drilled through the flange in the frame rail extension while removing the old metal. Therefore only few drilled holes can be seen in the above picture.


The separate rear part of the pan needs to be narrowed for about 6 cm as it is meant for coupes and fasbacks which do not have inner rockers. I was so busy working with it that I forgot to shoot pictures of it. Now I had fixed the first half of the floor. I wanted to do something else for a change.


Saturday, December 27, 2008

Torque boxes and inner rockers

The inner side of outer rocker panel was in good condition. It has been covered with zinc in the factory. I ground the small amount of rust and painted it as well as I painted the rest of the parts which would be covered when the new parts would be installed. The lower part of the rear torque box needed some patching but I decided to do it later after the inner rocker is installed.

Frame rails have been protected with paint.

The new parts looked great, but they did not fit exactly. The problem seemed to be that the inner rocker was about 1 cm wider than the original. Therefore it lined too high in the door jamb. I resolved the problem by bending the front torque box a little lower on the outer side. The inner side could then be hammered down to make it fit with the frame rail. Now the extra width was distributed evenly to the upper and lower area. I could be ground without having to weaken the spot welds.

Front torque box is installed and welded with spot welds
to inner rocker and seam-welded to the frame rail.
The side cowl panel and firewall still need some fixing.

As the inner rocker was in it's place I started welding it in the rear part of the car to attach it to the rear torque box. I had ordered new torque box covers but they are designed for coupes and fastbacks which do not have inner rockers. It almost ruined my christmas holiday once I realized that the part doesn't fit. After checking the I had correct parts I calmed down as I believed that there are no parts available for convertibles. So, they needed some modification to make them fit.

The modified rear torque box cover is being fitted

I spotwelded the cover to lower part of the torque box as well as to the inner rocker and rear frame rail. The leaf spring bracket was also welded to inner rocker. Now I could feel that the body (of the car ) was getting stronger again.

The lower right corner of torque box cover needs to be hand-made

I removed the rest of the of rusted parts to make room for fitting the new floor pans.

The floor has vanished. Not much left of the original

Floor pan under the rear seat was removed so that the new long floor pan can be fit.

Monday, December 15, 2008

Cleaning the driver side floor

Now the car was supported and back from the waterblasting. It was time to tear off the rest of the rusted-out parts. I decided to start on the driver's side. First I removed the rear floor pan which did not take long. It almost came out with bare hands. Then I drilled and grinded the seat platform. You can see the diffence between the waterblasted metal and the part of the floor which lyed under the seat platform.

I still left floorpans connected to front frame rails. I wanted them to remain as long as possible to give the body some support. The floorpan doesn't even touch the inner rocker any more. After removal of the seat platform the inner rocker is practically in two pieces. The front and rear are connected only by the outer rocker. The inner rocker was removed piece by piece.

The pieces of Boston railway track do not support the car if they are separated by the rusted out rocker under the seat platform. Eventually after working a couple of evenings the most of the parts are off. I took some measures of the body just in case to control if it will be bent. So far it seems that the supporting structure is solid enough.


The front torque box is off. The frame rail needs to be patched. In this picture below you can see that the design of my "subframe connector" is incomplete. The frame rail can not be replaced as the car is standing on it. In this case only patching it was enough, so this did not bother that much. The second disadvantage is that the new torquebox does not fit in it's place. I needed to cut off the front extension of the outer rocker to be able to test-fit the new torque box. Well, it was shot anyhow...


Note that the car is standing on only four jackstands. The subframe appeared to be so stiff, that only three would have been enough. I patched the front frame rail, removed the remains of the rust and primered the new torque boxes and inner rocker before fitting them in place.


Front torque box above and rear torque box cover below.The phase of drilling and cutting the left side floor is over. It took longer than I expected because I wanted to make sure I won't do any irreversible mistakes. I'm sure that when I get to do the same on the other side I'll do it much faster.


Not much left of the inner rocker under the seat platform area.

Tuesday, December 2, 2008

UFO in my garage

Due to snowy weather conditions the trip to waterblasting took two weeks. But finally you could see a shiny unidentified object flying in to my carage.


The additional support structure can be seen under the floor of the flying Mustang. The rust damages were revealed earlier. Now it was able to see all the earlier patches too.


 Driver side rear wheel well and rear frame rail after the wash. Note the patch by the Swede on the right and the beutiful design of my subframe connector.


The trunk floor drop-off is made of bondo.


This one is my favorite. The wheel flare is made of...

...NO ADMITTANCE sign ! Ford NOS-part no: C5ZZ-1234-XX
But the car was back home in my small garage in one piece. The sheet metal parts which I had ordered earlier from the local dealer were soon to arrive and at last the restoration was able to start without the risk that the fumes and smoke from burning bondo would fill the house.


 Three months had passed since I drove Mustang for the last time and the job was about to start.