Friday, January 25, 2013

Convertible Top Replacement Part IV

There were minor jobs to do in order to finish my top replacement project. The header bow was spread some glue on and header seal was stapled on. The seal has two layers so I hit the staples between them and added glue to mate the layers.

Glue, staples and some more glue.

Header bow seal in place.  It should have been a bit more
ahead to make it easier to latch the top closed.
Then the new flat metal listing was slipped in the listing pockets and screwed in to bow #2 and #3. These did fine. Hint: the distance between the pockets can be used as guide when defining the distance between bows when they are stapled to the stay pads. I didn't measure but succeeded by chance.


In my opinion and based on my trial&error, hitting staples to bow #4 are not needed until now, in the very final stage of project.

Followed by wire-on.


I had purchased a set of new weatherstripping for the top. Sadly no pictures available. The hint for the installation is to first install all weatherstripping loosely , then verifying the fit prior to screwing and gluing. The long weatherstrip for header was not perfect fit and needed some modification.

The Epilogue


Below are a couple of shots of what came out of the project. Once I finished with the top replacement the springtime was at hand and I folded the top down where it remained until the end of September when it was too cold to drive with open top.


The inside looks even better live than in pictures
A new car smell

 
The interior quarter trims got new skins
Not sure what is the purpose of that piece hanging there in the rear
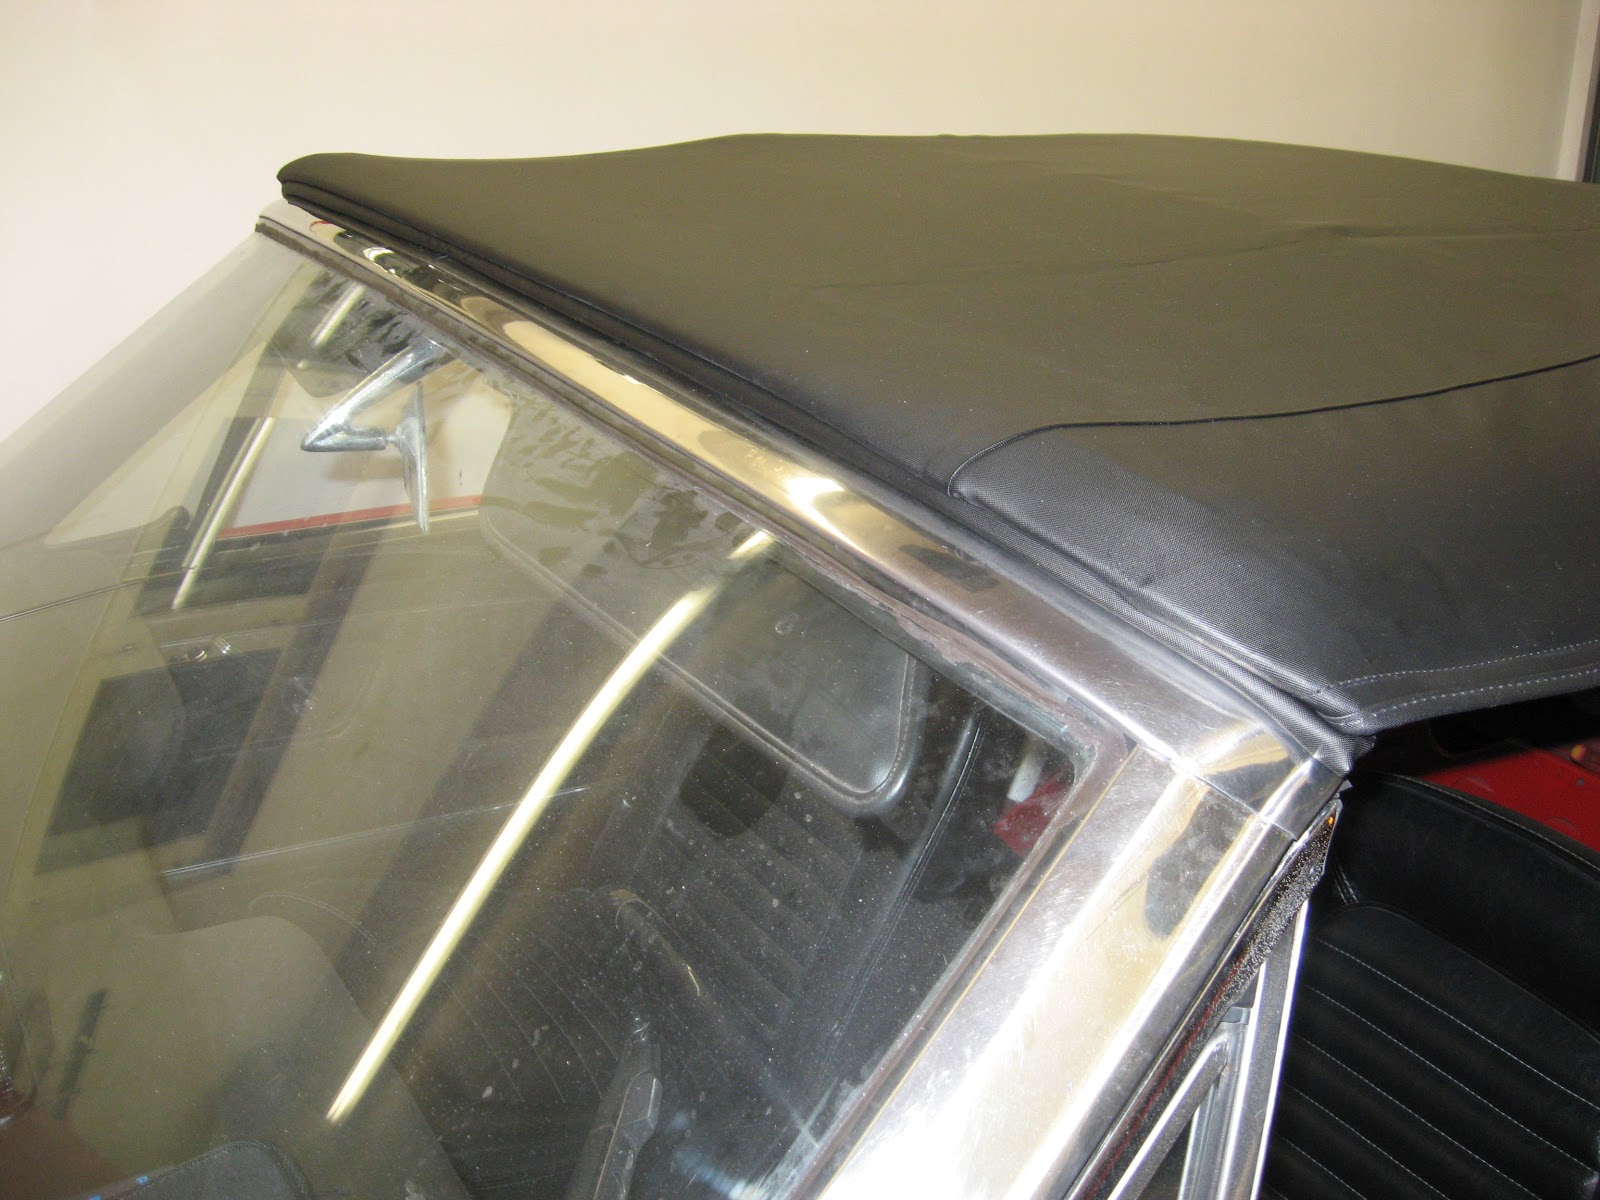
The C-pillar area needs one more re-positioning

There are sort of "ears" where the edge turns from vertical to horizontal.
The flaps should have been pulled even tighter. I just can't figure how.


The dents have not straightened after months in the garage.


The end result may not be the best possible but it keeps the rain out and no leaks have been found so far. The rear tacking strip is still waiting for my inspiration for doing it one more time. 

Here are a couple hints if you are planning on replacing your top.
  1. I can not recommend EZOn vinyl top for anyone (especially not for '64-'66)
    • EZOn is affordable, but not very flexible
    • Every time the top is lowered and raised there are dents and lumps somewhere
    • More valuable canvas material tops will look better on
  2. Consider hiring a pro to do the job for you
    • The materials cost me altogether around € 600
    • The estimated cost for a pro was from € 1500 to € 2000 including the materials
  3. If you are a stubborn DIY man (like I am)
    • Have patience ! (which I didn't)
    • The more time you spent, the better the result !


Thursday, January 10, 2013

Back Seat

When assembling the interior almost three years ago, I installed the seats back in without making improvements as the covers of the seats were in good condition and I was in hurry to get the car on the road. After reading Alex's post of the seat renovation, I finally decided it was time to move ahead in Destiny's To-Do List. The back seat surely is a good place to have sex, especially if you and your partner are mice, as I think the following pictures will prove.

Back part removed

Hog rings cut and seat cover removed


Removing the thin foam

OMG !
There was nothing to be saved of the original cushions and other cloth. I saved the removed parts a while to take measures and pictures. Cleaning the frames thoroughly is a mission impossible unless you can have them sand-blasted. I cleaned as much as I could, then applied some rust-encapsulator and paint.

Rust cleaned and capsulated

Burlap-and-wire was lost so burlap-with-plastic-wire introduced.
I sewed the edges myself !


Some padding to the edges.


30mm of foam followed by two layers of cotton padding

Seat cover hog ringed
 

Tag plate reinstalled

Ready !

Then the same series of events for the seat part. This was, predictably, in even lousier condition. The stuff was dumped in waste bag as soon as it was detached from the frame.


The rear seat upside down

I was hard to see where evereything was attachd as it cracked up instantly.
Here the paper covered listing wires.
Madam, please have a seat !


Cleaned !
I sewed pockets with wire to the burlap and ringed it to the frame.
Listing on both sides of the center

I cut slits to the foam to be able to squeeze hog rings...

...which connect the cover to the listings.
Pay attention to the longitudinal position before hog ringing this. I had to re-do.
The wired edges of the cover didn't make it. I had to pull the cover one more time. My friend did the sewing with nice black leather she had and helped me to install the cover.


The front seats might need similar treatment, but for that I need to order new cushions from NPD, maybe that has to wait until next time or until I will remove them for adding sound insulation under the carpet.

Thursday, January 3, 2013

Pigtail quick fix

During my speedometer update I paid attention and remembered that the electrical part of the ignition switch was in bad shape. Maybe this car has been a victim of a theft or maybe one of the earlier owners had tried to convert the switch to be what nowadays is so popular in new cars, keyless ignition that is. However the wires had been cut just beside the switch connectors. I had earlier tried to fix the wires by soldering them but now, as it was easy to access the switch through the instrument panel opening, I had to do it better. At this point I also remembered that during the last couple of times when firing up the engine there had been some sort of fog coming from the heater grid at the front of windshield. Now I realized that it may not have been autumn humidity but actual smoke from electricity.

If you live somewhere where there's NPD located near you or at least on the same continent klick here , buy the pigtail, replace the connectors and forward to the next blog post. I instead called the three local suppliers but none of them had the pigtail in their supply. After pulling the switch I tore it apart and gauged 4 ohm resistance "fixed" part of the wire. Then the remainders of the connectors were pulled through the rubber part of the pigtail.


New wires with new connectors were punched through the rubber. The original connectors are L-shaped and I had to use straigth ones so some drilling was needed.

Finally (after less that one hour later) all the wires were there and the assembly was ready to be installed back in.


Fixing the connector is not the big issue in this post. The big thing is the effect that the better wiring does for the voltage delivered to the spark plugs. My theory of the effect is this. The distributor points cut and connect the current that is fed to the primary wiring of the coil (1.5ohm). Prior to the coil there is a resistive wire (also 1.5 ohm). So the actual voltage the coil gets is a half of the 14 volts that the alternator produces while engine running.  The primary voltage is transformed in the coil to secondary high voltage. The secondary voltage should be somewhere over 20.000 V.

What will that extra 4 ohm resistance cause when conneted in series of the purposed 3 ohm resistance. Now there will be 7.0 ohms altogether of which 5.5 ohms prior to the coil. So there is only 3 volts (1.5/7.0 times 14 V) left for the coil's primary meaning a significant drop in the secondary voltage due to the fact that it is directly relative to the primary voltage.  When feeding 3V instead of 7V means that my spark plugs would only get under 10.000 Volts which surely is not enough to properly ignite all the fuel/air mixture in the cylinder. Destiny has lately suffered from bad fuel/mileage (almost 18 litres per 100 km) so the reason for me being so excited about this is that hopefully this post should be regarded as Part I in the Chase for Better Fuel Economy. I haven't been able to make road test so far (due to the fact of almost 2 feet of snow outside), but idling and revving have improved so I may be on the right path.