Then it was time to fit sail pads to rear curves between the bow #4 and the outer tacking strips. The meaning of sail pads is to smooth the area when the top is on and to protect the top material when the top folded in the rear well. Initially my car did not have sail pads. I’ve heard that many shops leave them out, maybe for saving time or for the reason that they actually are not needed. Later I have noticed that they only add to the thickness and make the folding more difficult.
 |
| The lower edge of sail pad has been stapled to outer left tacking strip |
 |
| Excess material has been trimmed off |
After stapling the sail pads I trimmed the excess material and taped some Gorilla Tape along the bow #4 to cover and smooth the staples and edges so that they would not be seen through when the top material is on. Sorry, no picture.
I had taken the top out of box a few days earlier hoping that it would straighten but when placed on the frame it still had folds, dents and looked too narrow for a Mustang. When aligned on the driver side it it seemed like two inches were missing from the passenger side. I measured and marked the center line to the masking tape in the inner side as well as marked the centers to the bows. The next step would be the defining one. Where to start attaching as from now on there would be no return.

As far as I know there are two ways to proceed:
- Staple to the rear tacking strips according to the reference marking in the top and then move to the header bow. This article on Mustang Monthly describes this method for a fox body Mustang.
- Staple to the #4 bow and the move to two directions after that This is how dalorzof did it so I decided to try this one.
So, I placed the top on, centered it and hit a couple of staples to the outer ends of bow #4 and the Mistake#1 was done. I hadn't paid enough attention to that my bow height was not exactly 21". I had to pull the top, gorilla tape,the upper staples from sail pads and rear curtain and from the stay pads on bow #4 and move the bow #4 to correct position and then do all the previous mentioned stapling and taping again.
Round two with the top staples and the Mistake#2 was done. This time I had not given enough attention to where the flaps on the side rails in c-pillar area would reside. Now realizing that I would not be able to make them fit against the side rail over the quarter window where the flaps are supposed to be glued. The top was placed too much forward. I had to pull the staples and that would later be seen like this.
 |
| Two lines of holes from stapling without checking first |
OK. I had my top still loose and tried to figure out how to make those flaps fit against the quarter window side rails. I decided not to hit more staples until the fit of these flaps was verified. I would not worry about the centering for if the flaps are in correct position the top will automatically be in center position.


Next thing to do was to define the correct position for the flap on one side, punch holes for the old weatherstrip which would be used as a clamp during the glueing. Then I mixed some 2-component epoxy glue , spread it to the flap and to the side rail surface, placed the weatherstrip-clamp and tightened. This was easy on one side. On the other I had to ask help from my daughter for attaching the clamp while I was stretching the top. Once clamped I left it for a day to let the glue dry.
Next day I started with hitting a couple of staples to the rear end and placing the top loosely, only to be able to attach the tacking strips to the well knowing that I would have to do it over and over later. Then pulled the top forwards bent it over the header bow and marked the folding line with chalk. Then a couple of staples were hit, the top clamped in to on-position. This was repeated about three times until the correct stapling line was found.
Next day I started with hitting a couple of staples to the rear end and placing the top loosely, only to be able to attach the tacking strips to the well knowing that I would have to do it over and over later. Then pulled the top forwards bent it over the header bow and marked the folding line with chalk. Then a couple of staples were hit, the top clamped in to on-position. This was repeated about three times until the correct stapling line was found.
 |
| Front folded over the header and chalk line drawn |
 |
| A couple of staples is enough when fitting |
When the correct line for headerstapling was found some glue was spread and the top was stapled starting from the center and proceeding towards the outer edges. I stopped at 10 cm before the outer curve for glueing and placing the front side flaps (seen on the above pic) and securing the side tension cables to the frame. I left them dry over night and finished the outer edges the following day.
 |
 |
| The center has been stapled. |
 |
| Finished with stapling the header bow. |
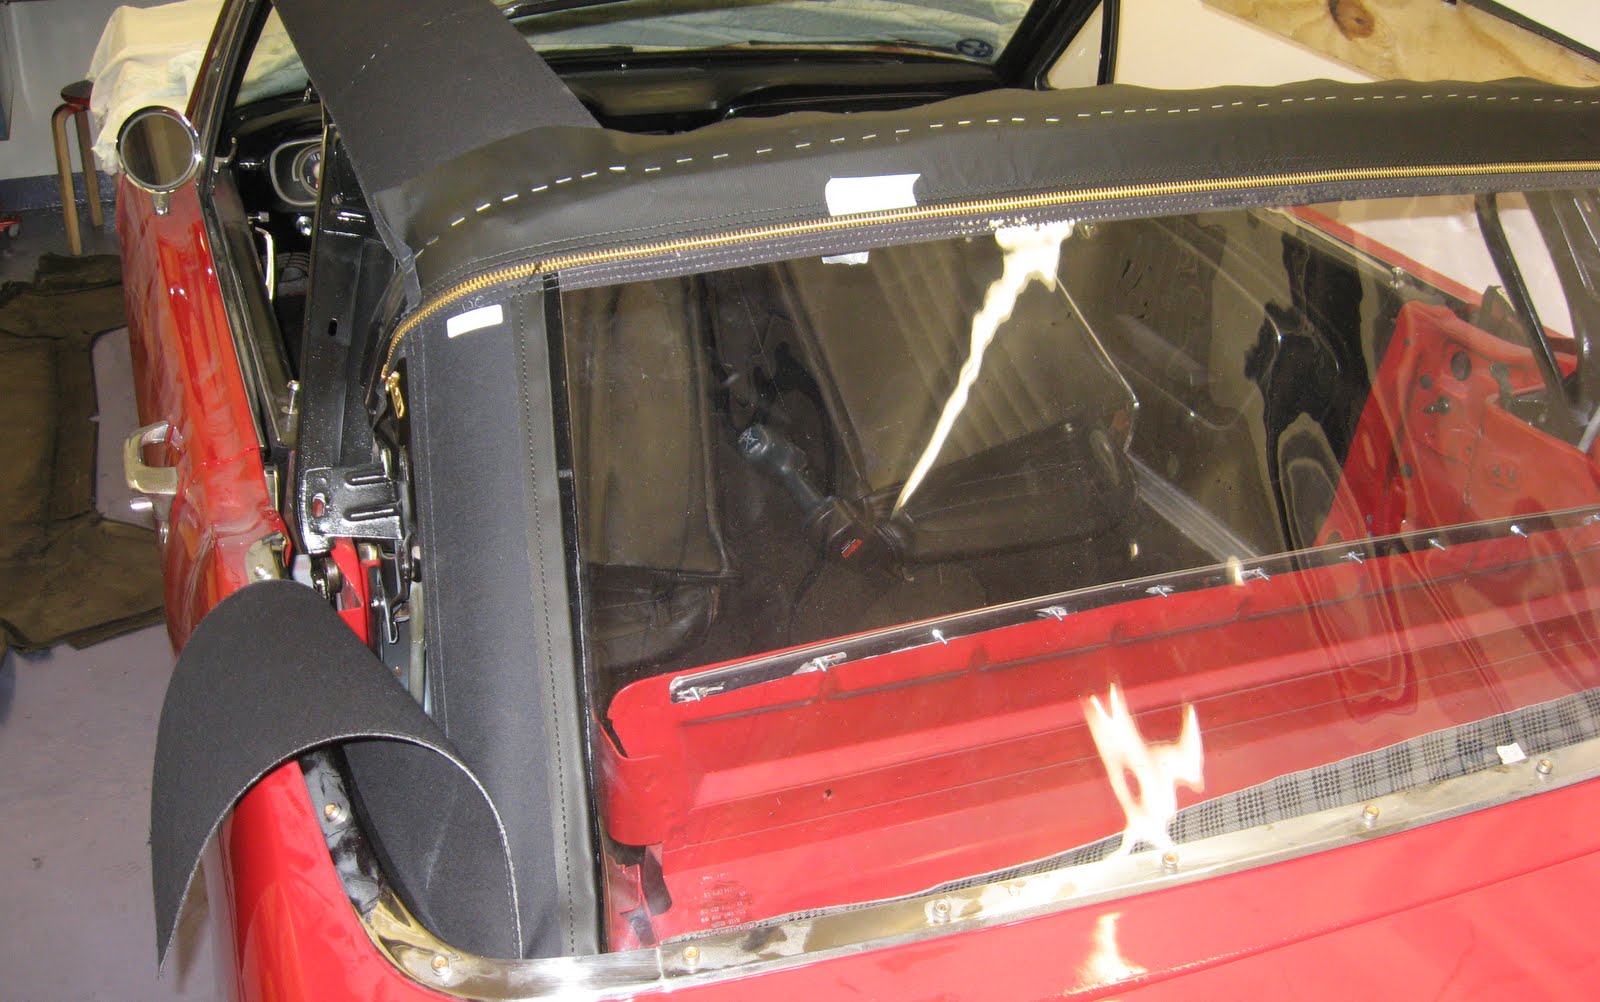
When the header bow was ready I focused on the rear tacking strip. A lot of patience (which I do not have) is needed to do this. The more times you are ready to repeat the steps the better result you will get. Staple, attach the tacking strip, detach, do it again until you are happy with it. EZOn Top has reference line in the rear edge. It may work for '67-'68s which to my knowledge have a straight rear tacking strip. My '65 has curved outer tacking strips. The problem can be seen in the picture below. There simply is not enough top material in the lower end of the top to be able to staple it in the outer tacking strip. Note the red sheet metal paint visible between the strip and the top.

Now this is the Mistake#3 but this one is not on me to blame. There should be more top vinyl to be able to pull it down and forwards to remove the folds on the c-pillar. I could not come up with anything to solve this so I had to accept it and proceed to the finishing steps which will be shown on the final Part IV of this series.