NPD provided me with EZOnAutoTops vinyl top, rear plastic window, top pads, sail pads, side tension cables, tacking strip material, and a new weatherstrip kit. In the package there was only a simple note that bow height 21” should be used. No other instructions.
The
hardware of the top frame was sandblasted and as soon as they arrived I painted
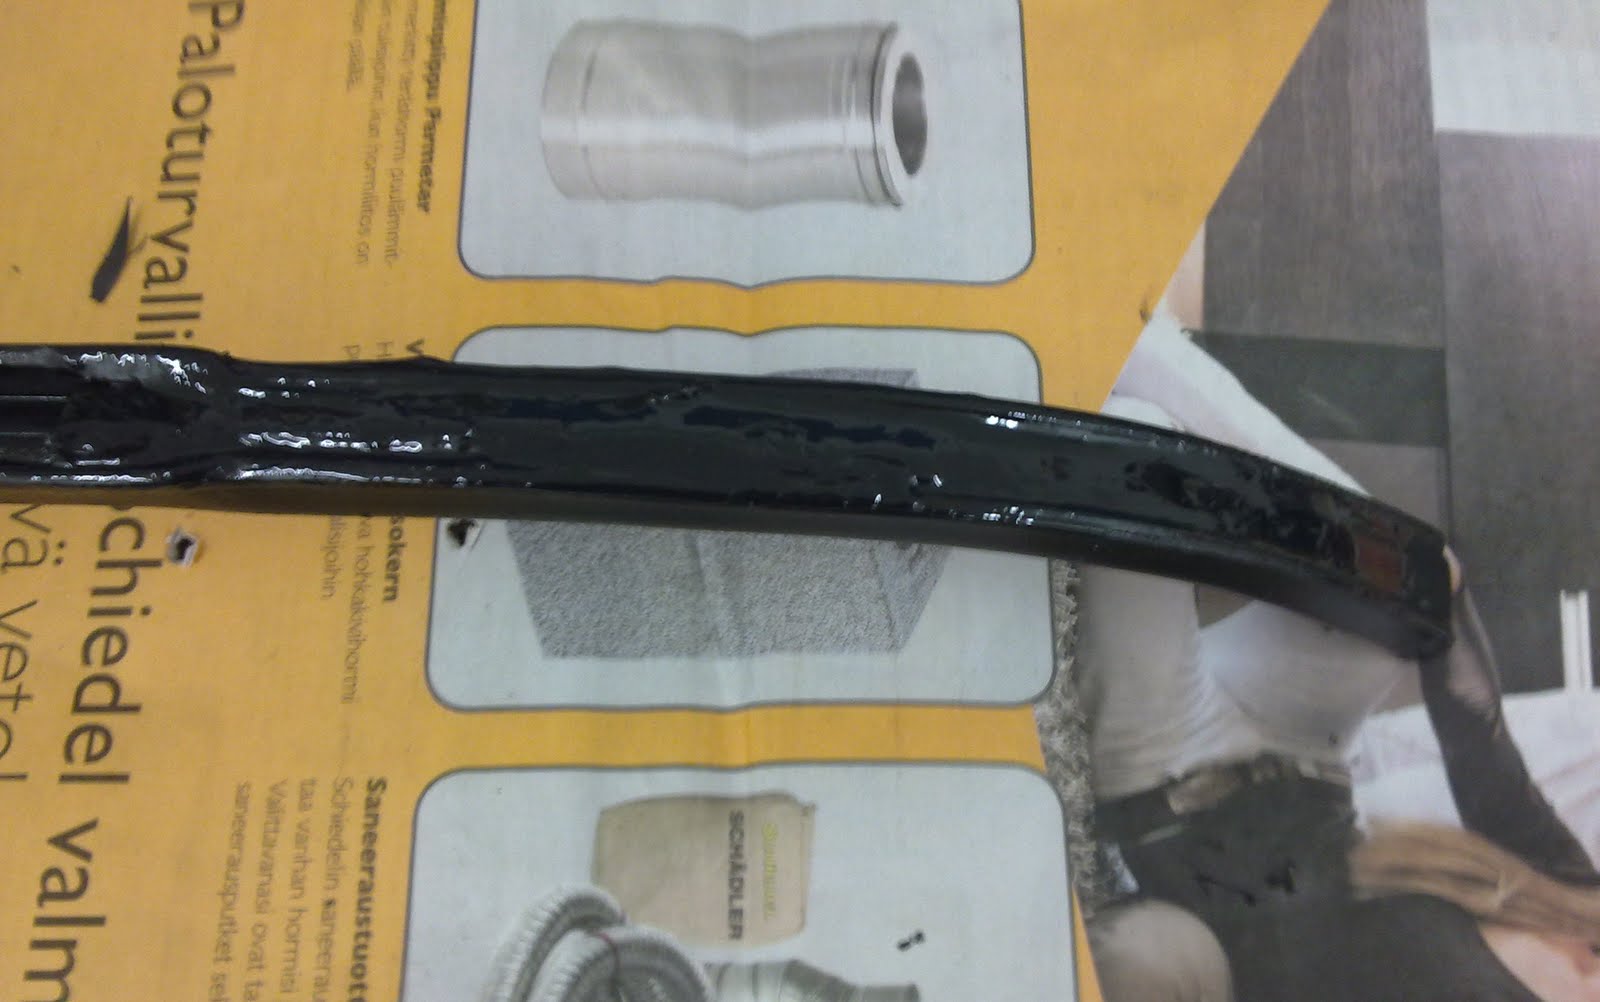
them with black rattle-can lacquer. The header bow needed new tacking strip. Here a is shot of the strip being fit with the header bow to be marked for holes. I applied Dinitrol seam sealer as glue between the strip and the header bow. Then riveted the strip to the bow.

There is a lot of discussion on the VMF about what material is the correct for repairing the bow #2 and #3 tacking strips. I think that any material which will hold the staples is good. And if this works for header bow, why not try it on other bows as well. So I did.

And the finished product
Afterwards I decided to use bolt and nut for attaching the bow brackets so there is some extra grip there. Then it was time to repeat the treatment for the bow #4. Note the remainder of the factory staple pins. I don't know what kind of stapler they used but they sit tight in the metal. So I left them there and just hit the new strip in.

And after two laminated coats of tack strip material.

If you have well documented the disassembly it shouldn't take long to put the frame back together. The nylon bushings of my frame were in excellent shape and they only needed to be cleaned, greased and put back to the pivots.

There are eccentric
bolts (on the right) that are to tune the frame so that side rails are parallel to the windows
frames. Basicly they used the same frame from '64½ to '68. To my knowledge there are differences how much there are adjustable joints, depending on the plant and year of the car. My frame had this and an other one at the #2 bow. I've heard that some cars have adjustable side main joint and eccentric at bow #3. This one didn't.

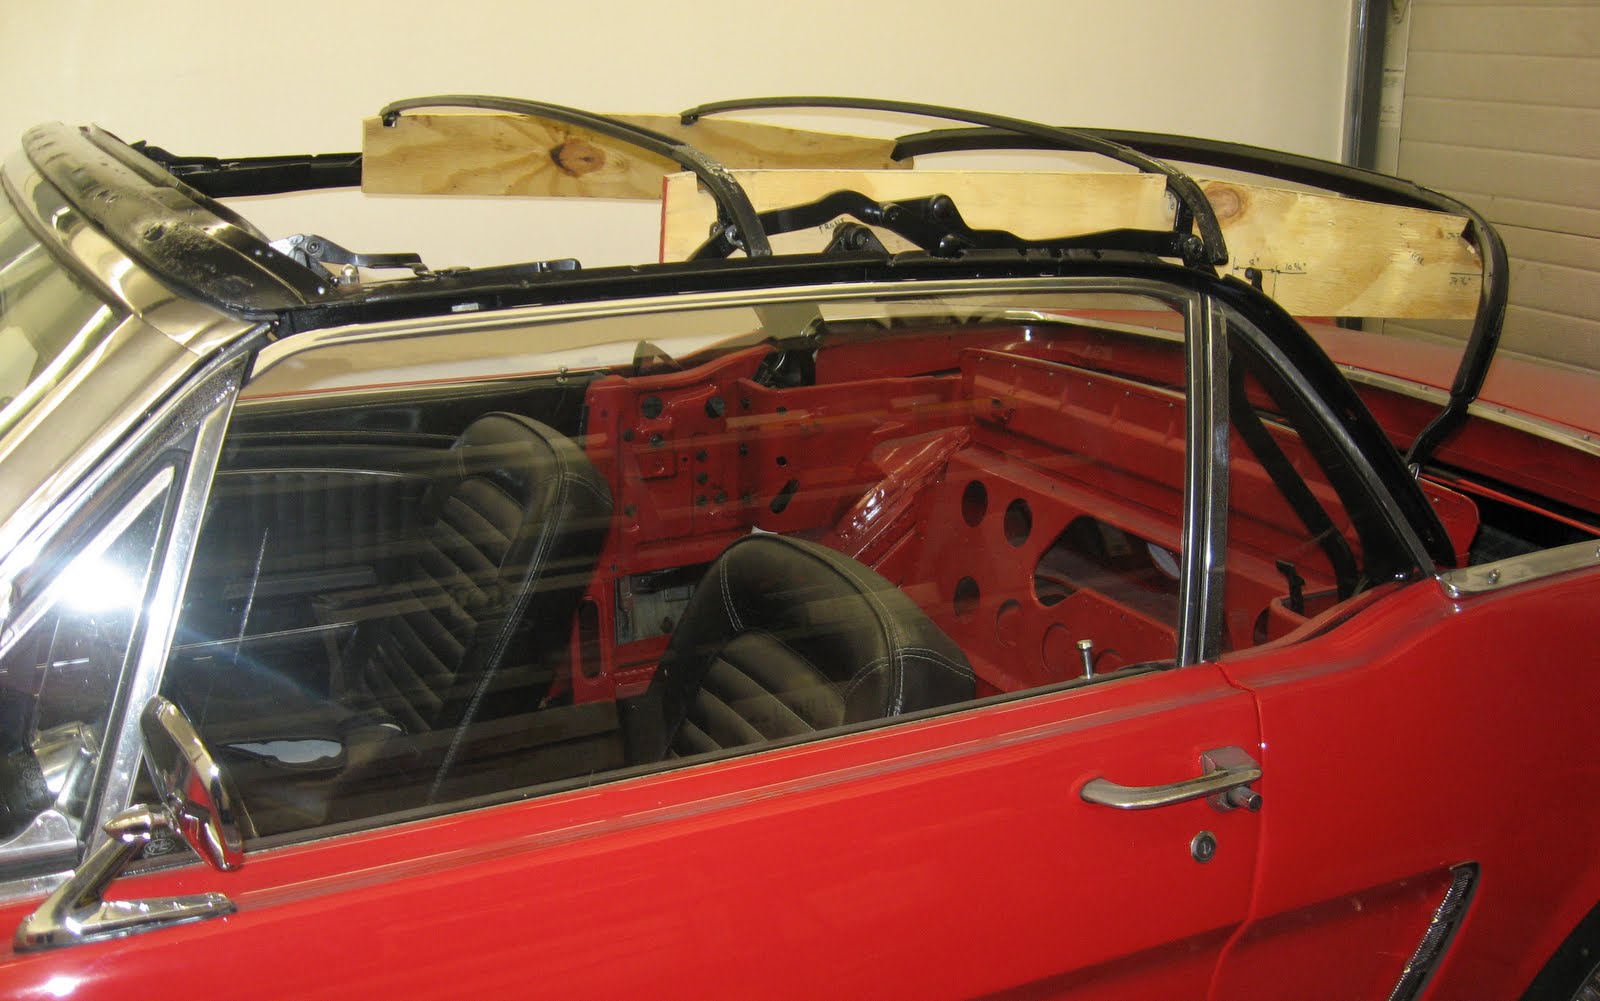
So the frame was there. Next I would throw in the plywood gauges that I had pre-fabricated according to the measures given. But the
gaudes wouldn’t fit at all ! Not until I deciced
that the hole for bolting the gauge to the coat hanger thread should be
moved forward and down. I drilled another hole which is 3/4” forward and 1/4“ -1/2” lower that the
original and now it felt fine. (I later had email conversation with Australian guy Richard, The Convertible Top Guy at VMF, nickname dalorzof , and as he had come to the same result, I felt this project might have a chance to succeed).
It also needed some modification to hold the #4
bow at the requires 21” bow height.

And stapled the pad to the other bows

'65 has rear tacking strips with notches in the center part and curved outer strips. I replaced the tacking materials and painted them. The material is easy to replace by twisting the folded edges open a little bit. Sorry no pics of this phase. Then the center of the rear plastic was measured and the plastic was stapled to the rear tacking strip. I lined the lower edge of the plastic with the lower edge of tacking strip and stapled . The tacking material is about 4-5 mm in thickness and the plastic about 2mm. At this point I used 6 mm staples, but later found that it will accept the 10 mm staples. If you can find 8 mm staples suitable for your gun, I think they would be the best.
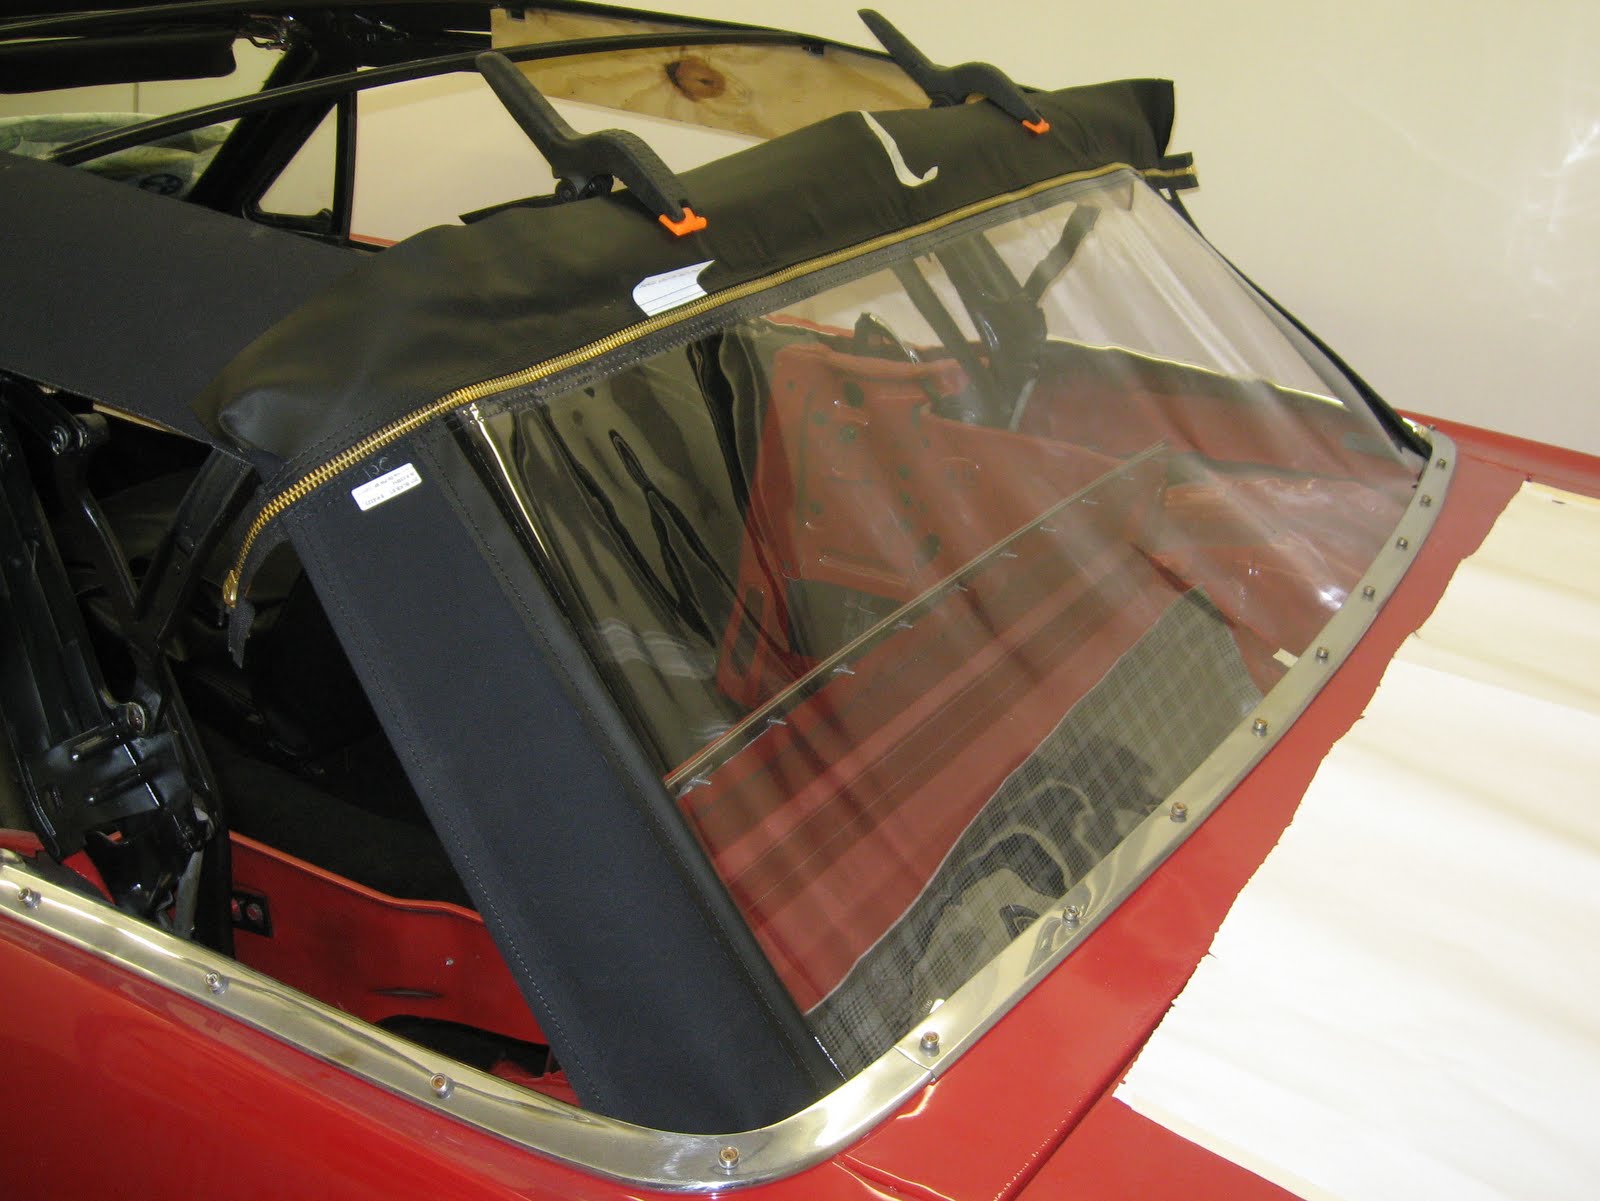
First fitting. It seems like EZOnAutoTop stuff is sharp cut and there is not much extra material.